It's nearly St. Patrick's Day! Following tradition, I used to make corned beef, cabbage and potatoes for dinner every March 17th. Ever since embracing a more compassionate life we've opt for roasted carrots and cabbage with a side of mashed potatoes. That actually is delicious, I'm getting kind of hungry just thinking about it! I wanted to try to replicate corned beef though. I contemplated - and still may try "corned jackfruit". Inspiration arrived when my daughter and I had a tempeh Rueben sandwich at Zingerman's Deli in Ann Arbor last week. It was fantastic! It was also (with a small bag of chips) $15. So, naturally, being thrifty and enjoying a challenge I thought I could replicate and perhaps even improve upon that sandwich.
The resulting sandwich was a hit! I would start the corned tempeh the day before serving to give it a chance to really soak up the "corned" flavor. All in all, this sandwich is a satisfying meal that needs little else to accompany it, except maybe a nice half-sour pickle.
Corned Tempeh Ruebens Serves 4 generously
In addition to the Corned Tempeh ingredients you will need:
1 loaf of sliced rye or sourdough bread -or- Schar Gluten-Free Deli slices
Thousand Island Dressing (recipe below) or grainy mustard for an oil-free option
Sauerkraut
Daiya Swiss slices (optional - I didn't use them)
A little Earth Balance or Olive Oil or a good non-stick pan for grilling the sandwiches
Making the Corned Tempeh
2 Packages of tempeh - I used Trader Joe's brand - cut in half (so now you have 4 squares of tempeh)
1 C Red wine
4 T Pickling spices
2 T mild yellow (or any flavor) miso- I also got this at Trader Joe's
2 C Water
1 Beet - washed and sliced
In a low, wide covered pan pour the wine, add the spices, sliced beet and miso.
Arrange the tempeh squares around the pan.
Add the water. Cover and simmer on low for 30- 45 minutes. Adding more water, if necessary. Turn occasionally to thoroughly and evenly flavor the tempeh. Also the beet slices add a nice color. You want to end up with about a cup of liquid. Remove pan from heat and transfer the tempeh and broth to a sealed container and place in the refrigerator for 24 hours. Turn the pieces if you happen to think of it. After 24 hours the liquid will be absorbed into the tempeh.
Making the sandwiches
You can prepare your tempeh one of two ways:
1) Brown the whole square in pan on the stovetop in a non-stick pan or with just a touch of olive oil.
-OR-
2) Make a paste of brown sugar and mustard. coat the tempeh pieces and brown in a 375 degree oven just until bubbly. This is also acceptable to serve sliced with cabbage and potatoes for a traditional style St. Pat's feast.
Next slice the tempeh slightly thin. I use a serrated knife for this and work slowly and carefully trying not to crumble the tempeh.
Assembling the sandwiches:
Spread a generous amount of Thousand Island Dressing on each slice of bread - for an oil free option use grainy mustard.
Top one slice with some sliced Corned Tempeh and a generous amount of sauerkraut. Put your other slice of bread on top and we are ready to grill this thing!
I used a cast iron skillet over medium low heat. I used a bit of Earth Balance on the outside of the sandwich, too.
Once your pan is heated place the sandwich in the pan - then I like to really squish then down while grilling so, I put another cast iron pan on top. Grill for 3-5 minutes. Flip gingerly - like, oh so gingerly so it doesn't fall apart and grill the other side for another 2-3 minutes.
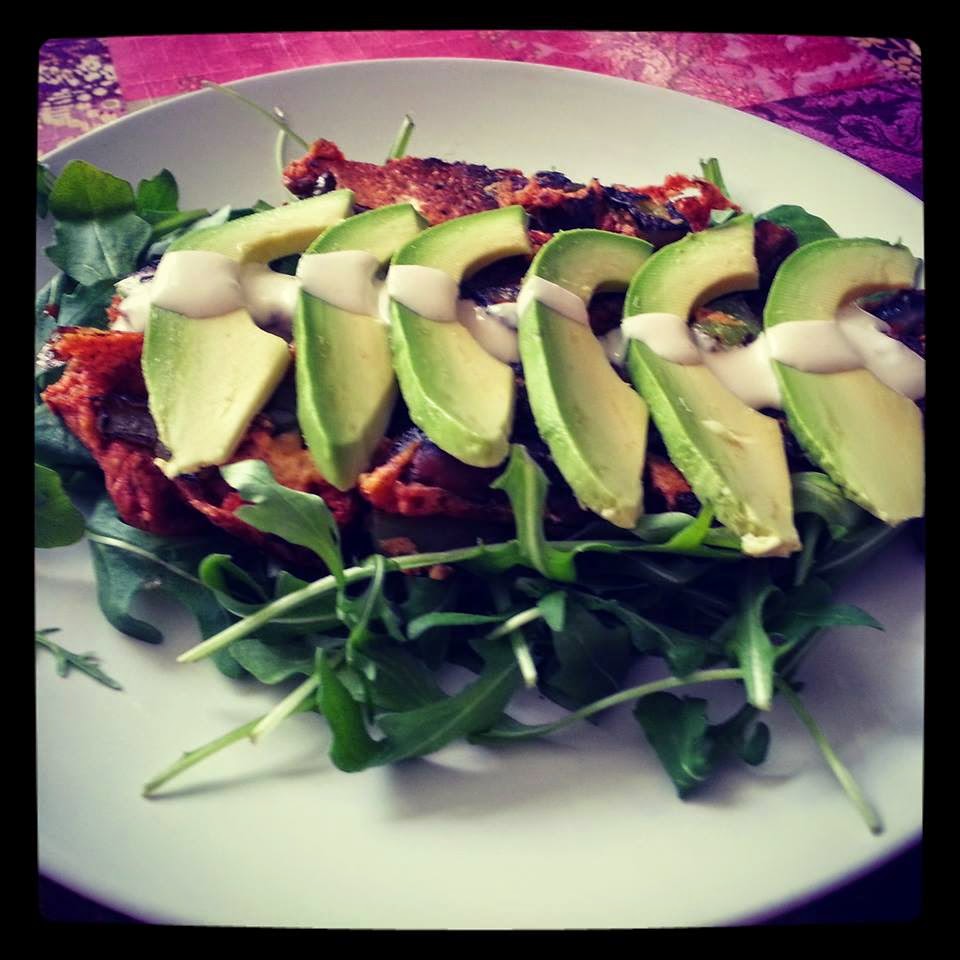
(optional amazement) for a completely non-traditional treat you can add baby spinach, sliced avocado, grilled onion - the sky's the limit! Or you can just do what I do and add some more Thousand Island Dressing.
Cut that sandwich in half, make it look all pretty on a plate and BOOM! dinner is served.
Sláinte, iterally translates as "health" in Gaelic. For your health. For the health of the planet. I hope you enjoy this delicious, compassionate option this St. Patrick's Day or anytime you get a hankering for a big ol' deli sandwich.
Sláinte, my friends!
Thousand Island Dressing:
1/2 C Ketchup
1/2 C Just Mayo
4 T Sweet pickle relish
1 T Horseradish (optional)
1 T Grated onion (optional)
Just mix it up and it's ready to go. Use as a sandwich topping or salad dressing.